
Vinyl plank flooring is a popular choice for many homes because it looks great and is pretty easy to maintain. But, like anything in your house, it needs regular cleaning to stay in top shape. If you’ve ever wondered, “How do you clean vinyl plank flooring?”
Key Takeaways
- Always start with a dry sweep or vacuum to remove loose debris.
- Use a damp microfiber mop and mild soap for everyday cleaning.
- Avoid steam cleaners and abrasive tools to prevent damage.
- Handle tough stains with baking soda, rubbing alcohol, or mineral spirits.
- Quickly clean spills and use mats to keep dirt at bay.
Essential Tools and Supplies for Cleaning Vinyl Plank Flooring
Choosing the Right Mop and Broom
When it comes to maintaining your vinyl plank flooring, the first step is selecting the proper tools. A soft-bristled broom or a vacuum with a gentle brush attachment is ideal for picking up dirt and debris without scratching the surface. For mopping, a microfiber mop is your best bet. It’s gentle yet effective, and it won’t leave behind streaks or damage the vinyl.
The Role of Mild Cleaners and Vinegar
Harsh chemicals are a no-go for vinyl plank floors. Instead, stick to mild cleaning solutions. A simple mix of warm water and a small amount of mild soap works wonders. For a natural approach, try a vinegar solution—combine one cup of white vinegar with one gallon of warm water. This not only cleans but also helps restore the floor’s natural shine. Remember, always test any cleaner in an inconspicuous area first.
Why Microfiber Cloths Are a Must
Microfiber cloths are a game-changer for cleaning vinyl plank flooring. They’re soft, absorbent, and perfect for wiping up spills or giving the floor a quick dry after mopping. Unlike traditional rags, microfiber won’t leave behind lint or scratches, making it a must-have in your cleaning arsenal.
Proper tools and gentle cleaners can make all the difference in keeping your vinyl plank flooring looking its best over time.
this guide will walk you through the process step by step. Let’s make your floors shine without breaking a sweat.
Step-by-Step Guide to Cleaning Vinyl Plank Flooring
Dry Sweeping and Vacuuming Techniques
Start by grabbing a broom or vacuum to clear away loose dirt and debris. This first step is key to preventing scratches when you move on to mopping. Make sure to get into the corners, under furniture, and along the edges of the room. If you’re using a vacuum, go for one with a soft brush attachment to avoid damaging the floor’s surface.
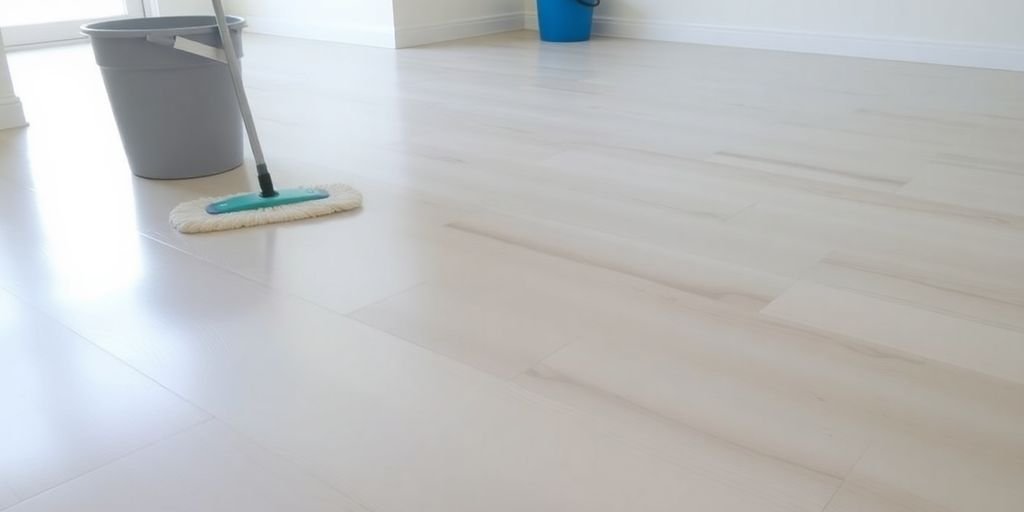
Damp Mopping for Everyday Cleaning
Once the floor is free of dust, it’s time to mop. Use a microfiber mop dipped in a solution of warm water and mild soap or a vinegar mixture (1 cup vinegar to 1 gallon of water). Wring the mop out thoroughly—vinyl doesn’t like excess water. Mop in the direction of the planks for a more polished finish, and apply gentle pressure for any stubborn spots.
Rinsing and Drying for a Streak-Free Finish
After mopping, rinse the floor with clean water to remove any soapy residue. Use a damp mop for this step, then dry the floor with a clean microfiber cloth or towel. Leaving the floor wet can lead to streaks and slippery spots, so take a few extra minutes to ensure it’s completely dry.
How to Handle Stubborn Stains on Vinyl Plank Flooring
Using Baking Soda for Food Stains
When food leaves behind a stubborn mark on your vinyl flooring, baking soda can be your best friend. Start by mixing equal parts baking soda and warm water to create a paste. Apply a small amount of this paste to the stain and gently scrub with a soft-bristle brush or microfiber cloth. Avoid using wire brushes or anything too abrasive, as this can scratch the surface. Once the stain is gone, wipe away any residue with a damp cloth, and dry the area completely to prevent streaks.
Removing Ink and Dye with Rubbing Alcohol
Ink and dye stains, like those from markers or hair dye, can be tricky but not impossible to remove. Dampen a soft cloth with rubbing alcohol and gently blot the stained area. The alcohol helps break down the stain without damaging the vinyl. If the stain persists, repeat the process until it fades completely. Always test the alcohol on a hidden area first to ensure it doesn’t discolor your floor.
Tackling Crayon and Paint Marks with Mineral Spirits
Crayon marks or paint splatters can seem daunting, but mineral spirits can make quick work of them. Pour a small amount onto a clean cloth and rub the affected area gently. Crayon wax and paint residues will start to lift off with minimal effort. Once the stain is removed, clean the area with a mixture of mild soap and warm water to remove any leftover residue. Don’t forget to dry the spot thoroughly when you’re done.
For all stain-removal methods, test your cleaning solution in an inconspicuous area first to avoid any unintended damage or discoloration.
By using these targeted techniques, your vinyl plank flooring can stay spotless and look as good as new.
Preventing Damage While Cleaning Vinyl Plank Flooring

Avoiding Over-Saturation During Mopping
One of the easiest ways to damage vinyl plank flooring is by using too much water while mopping. Excessive moisture can seep into the seams, causing the planks to warp or loosen over time. Always use a damp mop, not a soaking wet one, and wring out as much water as possible before cleaning. If you’re using a homemade cleaning solution, ensure it’s well-mixed and doesn’t leave puddles on the surface. After mopping, dry the floor immediately with a clean microfiber cloth to prevent any lingering moisture from causing harm.
Why Steam Cleaners Are a No-Go
Steam cleaners might seem like a quick fix for tough messes, but they’re a big no for vinyl plank flooring. The high temperature and moisture from steam can weaken the adhesive that holds the planks in place and may even cause the vinyl to bubble or peel. Instead, stick to gentle cleaning methods like a soft mop or a vinyl-friendly cleaning solution. If you’re dealing with stubborn dirt, let the cleaner sit for a minute or two before wiping it away—no steam needed.
The Dangers of Abrasive Cleaners
Harsh chemicals and abrasive scrubbers can do more harm than good. Cleaners containing ammonia, bleach, or other strong ingredients can strip the protective coating off your vinyl planks, leaving them dull and susceptible to scratches. Similarly, abrasive tools like steel wool or stiff brushes can leave permanent marks. Opt for a mild cleaner or a natural solution like diluted vinegar. For tougher spots, a soft-bristled brush or a microfiber cloth will get the job done without causing damage.
Remember, taking a little extra care during cleaning can go a long way in keeping your vinyl plank flooring looking as good as new.
Looking for expert flooring solutions? From hardwood to vinyl, we provide top-quality installation and unbeatable service. Call us now for a free consultation and transform your space with the perfect flooring!
Tips for Keeping Vinyl Plank Floors Clean Longer
Regular Maintenance Practices
Keeping up with regular cleaning routines can make a huge difference in how your vinyl plank flooring holds up over time. Start by sweeping or vacuuming daily to keep dirt and debris from scratching the surface. Even a quick pass with a soft-bristled broom can prevent long-term wear. For weekly maintenance, use a damp mop with a mild cleaning solution to remove any lingering grime.
Using Door Mats to Minimize Dirt
Place door mats at all entrances to your home. These mats act as the first line of defense, catching dirt, dust, and small rocks before they can scratch your flooring. Encourage family members and guests to remove their shoes when coming indoors. This simple habit can drastically cut down on the amount of dirt tracked onto your floors.
Quick Cleanup of Spills and Stains
Spills happen, but the key is to clean them up immediately. Vinyl plank flooring is moisture-resistant, but letting liquids sit for too long can lead to stains or warping. Use a microfiber cloth to blot spills and follow up with a damp cloth if needed. For tougher stains, spot-clean with a gentle cleaner, but always test it in an inconspicuous area first.
Pro Tip: Regular maintenance isn’t just about cleaning—it’s about preventing damage before it happens. Small habits like wiping feet on a mat or cleaning up spills quickly can save you a lot of effort in the long run.
Vinyl plank flooring is a popular choice for many homes because it looks great and is easy to maintain. But regular cleaning is key to keeping it in top shape. Need expert help? Contact us today for professional floor care!
Natural and DIY Cleaning Solutions for Vinyl Plank Flooring
Vinegar and Water Mixtures for Shine
When it comes to cleaning vinyl plank flooring, a vinegar and water mix is a game-changer. It’s simple, affordable, and super effective. Combine one cup of white vinegar with a gallon of warm water in a bucket. This solution helps remove dirt and grime without leaving a sticky residue. The acidity in vinegar gently cleans while maintaining the floor’s natural shine. For added freshness, you can swap white vinegar with apple cider vinegar.
Steps to use this solution:
- Sweep or vacuum the floor to get rid of dust and debris.
- Dip a microfiber mop into the mixture, wring it out well (avoid over-saturation!), and clean the floor in sections.
- Let the floor air dry or use a dry microfiber cloth for quick results.
Adding Baby Oil for a Polished Look
Want your vinyl floors to look polished without using commercial products? Add a teaspoon of baby oil to your vinegar and water mix. The baby oil adds a subtle sheen, making your floors look refreshed and new. Just make sure to mix it thoroughly to avoid slippery spots.
Pro Tip:
- After mopping with the baby oil mixture, go over the area with a dry mop or cloth to ensure there’s no excess oil left on the surface.
Creating a Gentle Soap Solution
For those who prefer a soap-based cleaner, you can create a gentle solution using dish soap. Mix a few drops of dish soap (free of bleach or moisturisers) in a bucket of warm water. This works wonders for sticky or greasy spots on your vinyl floors. Use the same method as the vinegar solution: mop, rinse, and dry.
Note: Avoid using too much soap, as it can leave a film on your floors. A little goes a long way.
For a weekly clean, try this effective DIY solution: a mix of water, vinegar, rubbing alcohol, and dish soap. It’s budget-friendly and keeps your floors in tip-top shape.
These natural and DIY solutions not only save money but also protect your vinyl floors from harsh chemicals. Give them a try and enjoy a cleaner, shinier home!
Common Mistakes to Avoid When Cleaning Vinyl Plank Flooring
Using Harsh Chemicals or Ammonia
One of the biggest mistakes people make is reaching for strong cleaners like ammonia or bleach. These chemicals can actually break down the vinyl, causing it to crack or lose its finish over time. Instead, stick to mild, vinyl-friendly cleaning solutions. Even products labeled as “all-purpose” may not be suitable, so always double-check.
Skipping the Drying Step
Leaving your vinyl flooring wet after cleaning might seem harmless, but it’s not. Excess moisture can seep into the edges of the planks, potentially causing them to lift or warp. Always dry the floor immediately after mopping to prevent water damage and ensure a streak-free finish.
Neglecting Regular Maintenance
Letting dirt and grime build up over time can lead to scratches and dullness. A quick sweep or vacuum every few days can go a long way in preserving the look of your floor. Don’t wait until the floor looks visibly dirty—by then, the damage might already be done.
“A little effort each day keeps your vinyl plank flooring looking fresh and new for years to come.”
Quick Tips to Avoid These Mistakes:
- Avoid steam cleaning, as the heat can damage the vinyl.
- Use a soft-bristle broom or a vacuum without a beater bar.
- Never use wax or solvent-based polishes—they can leave a dull residue.
Wrapping It Up
Keeping your vinyl plank flooring clean doesn’t have to be a chore. With just a few simple tools and a little effort, you can keep those floors looking as good as new. Whether it’s tackling spills right away, using the right cleaning solutions, or avoiding harsh chemicals, the key is consistency. So, grab your mop, put on some music, and make it part of your routine. Trust me, your floors—and your feet—will thank you!
Frequently Asked Questions
What’s the best way to clean vinyl plank flooring daily?
For everyday cleaning, use a soft broom or a vacuum without a beater bar to remove dirt and dust. Follow up with a slightly damp microfiber mop for a quick refresh.
Can I use vinegar to clean vinyl plank flooring?
Yes, you can mix one cup of white vinegar with a gallon of warm water for an effective and natural cleaning solution. Avoid using too much vinegar as it can dull the shine over time.
What should I do if I spill something on my vinyl plank floor?
Clean up spills immediately using a soft cloth or paper towel. For tougher stains, use a mild soap solution or a paste made of baking soda and water to gently scrub the area.
Are steam cleaners safe for vinyl plank flooring?
No, steam cleaners are not recommended for vinyl plank floors as the heat and moisture can seep into the seams and cause warping or damage.
How can I remove scuff marks from vinyl plank flooring?
Apply a small amount of jojoba oil or a mild hardware lubricant to a soft cloth and gently rub the scuff mark. Clean the area with a vinegar and water solution afterward.
What cleaning products should I avoid on vinyl plank flooring?
Avoid using abrasive cleaners, steel wool, ammonia, or high-alkaline products as they can damage the surface of your vinyl plank floor.
Upgrade your space with top-quality flooring! From hardwood to vinyl, we offer expert installation at unbeatable prices. Call us today for a free consultation and transform your floors effortlessly!
